Flying ... hmmm

Today i followed this tutorial to add a flying away behaviour to the bird NPC. But i am not quite sure if it has overcomplicated things and made it too specific.

birdNPCFlyAway.gif

He made a lot of hard coding of the target location and also took forever to get to the point and debug his issues while recording for that tutorial video. I was excited about his content at first because there are lots of interesting non human UE4 tutorials. but now im not sure if i can rely on his channel

Next step

  • Set up a behaviour tree for the bird

Bird NPC

I’ve been lazy documenting and making progress the last few days. Just a quick recap of what i actually got around to working on is a Robin bird npc that i think i will include into the scene at first as a friendly NPC.

birdNPC_1.gif

I am thinking through it the bird should be a “villain” that disturbs the player’s gameplay. I did some basic rig of it flying, idle and landing/threatening.

Also it’s super nice that yesterday i finally got a replacement for the corrupted 2080 ti with a 3070 from falcon. So far it seems to work reasonably well.

Light leaks 木漏れ日

Instead of doing something productive, I actually remembered I had an idea earlier last week to make some lighting effect so that it’s almost like the character’s world is situated in the canopy of trees where the light leaks in. (interestingly i just had a side thought as i was typing in that perhaps the skylight cloud probably isn’t going to be important since it should be obstructed by trees anyways.

ezgif.com-gif-maker (18).gif

I dug through a couple of google search and then realised this technique of having a “stencil” on a light is called a light cookie in unity, so i tried to search for the equivalent for UE4 - from a couple of forum posts I came to the realisation that i need to use the light function to impose the stencil texture.

Based on this water caustic tutorial, I had to do a bunch of adjustment to the actual shader graph to get what i need. I tried out many variation of panner, time, sine configuration for a wiggle effect. but then i ended up decided to scale back and just make flickering to the emission based on another texture with a linear sine (nice tip to learn today is that if you multiply the sine value by 0.5 then add 0.5 it makes it linear)

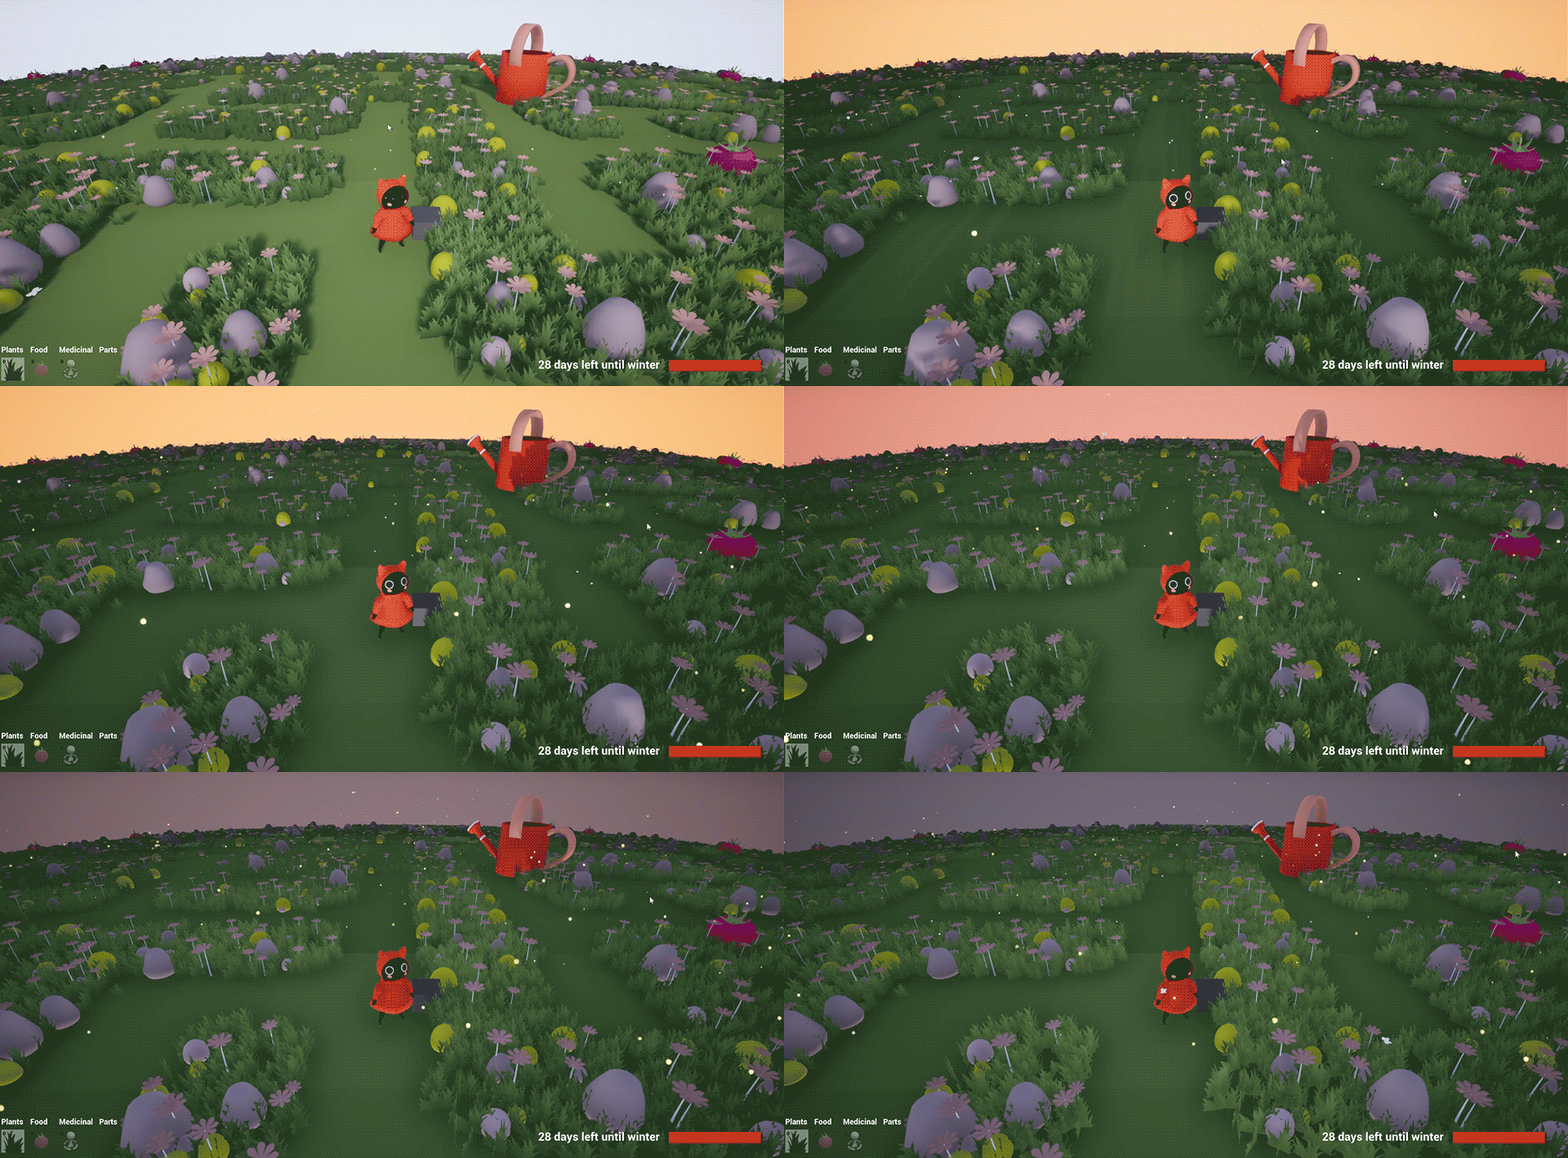
I also hooked up a colour and light intensity change with the day and night cycle inside of the BP sky sphere.

Next steps

  • Due diligence for the move to using an AI controller

Skysphere, wfc tile collider and pathfinding

Today I was little bit more scattered. I tried to fix a couple of issues with the selection priority but not a lot of luck. I did however set up a collision bound that is closely tied to the visual appearance with the WFC tiles. So i believe the location selection now is a bit more accurate.

bended-location-collider.gif

I then was trying to tweak the skysphere so the clouds are more prominent at the horizon. however i didn’t get much success except for tweaking the size of the skybox. which is a little tricky because if i want the map to continue extending it will get out of the skybox bound if it is too small

I also spend some time looking into how to have a better path finding system compared to the “simple move to” available for the player controller. there are some solutions on the internet where i can possess with an ai controller so i can take advantage of the path finding node set. I didn’t dig too deep so i probably need to do some more due diligence

Next steps

  • due diligence for the path finding

  • shading with the darker lighting condition

Collision refinement based on world bending shaders

So as i working through the click priorities from navigation to interacting with objects, i realised part of the issue for the poor selection abilities is because the visual vertex offset created in the shader,

colllisionWorldBend_1.gif
Screenshot 2020-11-03 161419.png

After reordering the click priorities in my controller. I decided to take a stab at offsetting a separate collider to where the mesh is visually seen. After some tweaking. I managed to get the BP_itemparent to set up a looping timer of a function that adjusts the collision bound based on the player camera position and the world offsets.

Untitled.png
colllisionWorldBend_2.gif

Next steps

  • Making some improvement in clicks and differentiating the navigation vs selection

Symmetric WFC tiles

I played with the pop up UI widget for a bit to try to recognise the widget click however, it seems to not able to detect the interactive collision. It might be because right now my controller prioritises the move to behaviour over the other hit check it does under the cursor. I got a little bit tired of working on it so instead I took a detour

I updated the WFC tile plugin which meant i have to remap the static mesh to actor pairing and figure a bunch of things out based on the new settings.

Ivan was kind enough to update the plugin to allow for symmetry across the x and y axis. as i plan to have restricted and infinite look of the same map tile set. I’m not so sure if it’s that useful any more.

WFCsymmetricTileSpawning.gif

Right now i have the Symmetric about the X and Y axis checked and grows and clean up after growing turned on. When the character gets to the far left and bottom edge, the tiles do not keep extending. I am wondering if it is only growing at positive direction from the starting location?

Next Steps

  • switch up the logic of the cursor click detection from prioritising move to to one that is based on object interaction first

pop up inventory

Back from my weekend away at Timbercove, I decided to take a stab at the pop up inventory. There are some tweaking that I had to do to the controller and set up a more granular collision channel since I wanna distinguish when to navigate based on the cursor ray cast.

popUpInventoryUI.gif

I wanted to reuse the smart way we currently set up the health bar where the rotating to face the player is only activated when the widget is visible. That means I need to send an interface message across the controller to the player (since controller is the only one that can detect the cursor ray cast.

Untitled.png
Untitled.png

Next steps

  • Make the Ui interactable

Fireflies with Day night cycle

I started making a fireflies particle system and it works pretty well. Then I got a little ambitious wanting to see if I can make it appear alternating day and night with the butterfly particle system.

firefliesDayAndNight.gif

There was definitely some trickiness to try to get the particles to blend into with each other. I initially did the set visibility option for both the particle systems but the fireflies one perhaps there is so many of them that it feels like it just pops in.

Untitled.png

Then i realised maybe activate and deactivate is a better alternative than visibility and that’s definitely the case, there still need to be some tweaking to make it feel right but i believe the overall direction is correct

Untitled.png

Oh i also pulled out the emission node for the materials as i need to start tweaking the shader so it looks good in different lighting conditions

Im going ton a weekend getaway so will probably get back to working on monday!

Next steps:

  • try out the pop up UI instead of the fixed HUD

Day and Night cycle

Today i first made the change for the recouping health logic. Yesterday my approach was more bit more brute force where i just cast to check if it is the tomato BP then add the health back inside of the widget slot logic. This time i realised i can add a “health impact” integer variable to the BP item parent and pull that into the health impact. some objects will have a neutral impact when used, but others like food and etc can change from positive to negative. I am excited for this because i feel like that i can possible do the mysterious fruit idea where you can take in a fruit but it’s never quite sure if it’s good for you or bad for you.

dayAndNightCycle.gif

Then I decided to add a day and night cycle to track the game loop. I first started to do it via the level blueprint, then realised it’s probably best to embed the logic within the BP skysphere. It was definitely not hard to set up. The really tricky one is actually how to hook up the “how many days left until winter” inside the HUD widget. It took me so long to figure it out, firstly is that “set text” doesn’t work for making things dynamic. You actually have to bind the text variable and use a separate variable to feed in the information you need.

Untitled.png

I had a thought last night of maybe removing the permanent hud and ask the player to click on the character to bring up the inventory so to remove the clutter. I do wonder if there is a way to make the sense of time more implicit rather than having it exposed all the time.

Also thought of a potential solution to the crafting clicking input conflict issue. Perhaps you can’t hold inventory of the crafted item. Once you have clicked it, it is “used” either it pops into the scene or it helps out with your health.

Next Steps

  • fix the floor shading issue

  • Add fire flies for the night time?

  • fix lighting issues at night (it doesn’t feel dark)

Surprising progress: Healing tomato & respawn

Today was quite surprising, I didn’t anticipate that I would make good progress, since usually when I do more programming heavy stuff (without tutorials) it takes awhile.

I added a new event in the damage component where health can be replenished. I was a little bit not sure how to trigger that event, I initially assumed that i should associate the item’s capability based on the BP item. However, i ended up hooking up the event in the widget slot component. right now it’s done with a cast to the specific object and I think i will need to set up a better system associated with that.

I then wanted to have the item respawn after being picked up. I was evaluating how i can get the actor component of the weighted table to work with the BP parent. then i ended up deciding the replicate the logic in the actor component into an actual spawner BP and spawn the item. Once the item is destroyed, the spawner will recreate the item based on the weight.

respawnAndHeal.gif

One thing i noticed is that i need to figure out the crafting ui in terms of when you want to create an item (like the potion) you click on it get new ones, but if you want to use them there isn’t a way to do it without conflicting with the creation input.

Next step:

  • Table of objects and impact on game play

  • Bird NPC (should they be villians?)


Probabilistic spawning and click interactions

So today I wanted to tackle the objects that the player can pick up.

I tried to make some changes to the way the pick up happens, in the past it is based on collision. if the player is close to the object they will just pick it up. this time i wanted to switch to be more deliberate when i found a tutorial that says I can do a “on click” event on static meshes. I tried doing that both on the item parent BP as well as the general target box BP (that i am currently using to test the destroy functionality).

No luck.

Weirdly that although my “on click” event isn’t firing (and i’ve checked both in the project setting and game controller setting that click is enabled), the “on cursor over” event works on a click. not quite sure why but i’ve left a comment in the blueprint graph to remind myself about that oddity.

weightedSpawnCollectable.gif

I then was referencing an old video I’ve watched before about how to generate recipes and spawn rate using a more formulaic approach. Not quite sure what is saying about frequency and rarity actually works for me. So instead of followed this youtube tutorial’s loot weighted table approach: using a mapped variable and some math to calculate. I think overall it did what I needed it to do.

Next Steps:

  • Being able to position the spawned object in relation to the WFC tiles

  • Able to recover health with eating a tomato

health bar for the player

So it was good that we set up the health bar for the general damage component but i didn’t want to have a floating health bar on top of the player just like the object since i wanted to track the health all the time.

It took me a little while because at first i wanted to do the youtube tutorial on health and hydration but then i realised it’s not super useful and takes too long to get to the point. I also reassessed if i want to have 3 different meters to track things, maybe it’s best to just have one meter of health that drops as the situation changes (too hungry, too tired and etc).

When i decided to add the health bar to the HUD, i realised that i needed to branch the damage component based on the owner of the damage component that got hit. But there isn’t a way to pull in the HUD widget which is not attached to the player BP. After multiple digging i eventually found out that the HUD component is not spawned in the player instead of the controller. Once i figured that i managed to hook up the health bar changes in the hud directly

ezgif.com-gif-maker (17).gif

Also i have been thinking about creating big robins or a herd of crows that can come in and disrupt the player’s actions
Next steps

  • growing fruits bp

Reusable healthbar component

After a week of my RTX 2080 Ti GPU corruption, Marcos was kind enough to lend me his gpu so i can get my PC back on track. I finished up the reusable healthbar component, based on this tutorial.

ezgif.com-gif-maker (16).gif

There are several new things i learnt:

  • actor component are quite neat to create so that i can just attach a bunch of behaviours to different actors

  • this also makes the component reusable over different scenarios, I think i can build in something to collect when the player destroys an actor on the scene

  • you can set timer by function, and c

I will probably be using this for the player to destroy obstacles.

Next steps

  • I’m going to start implementing the hydration and hunger meter from this tutorial

  • Probably should model a few things that I can collect resources on.

Finished the tileset generation so far.

I just got back today from the weekend staycation and finished up the basic tile set for the wang tile 4 edge system. There are some other tile variation i wanna do.

ezgif.com-gif-maker (15).gif

During the break i watched an episode of TIny World around garden and it was quite inspiring from an art direction perspective. I think there could be something quite fascinating there if we make the character a small wild life creature that is trying to survive the garden

We can have more small creature characters and the danger of the player is not something that is pure violent but simply of the fact that they are more fragile and overwhelmed by the world around them. I am imagining a beautiful england garden with fruits and plants through out the year. And the seasonality can come into place with the environment.

Lots of cute props from human can be inserted in, similar to some that we have seen in the Ghibli’s “The secret life of Arriety”

Next steps:

  • .Model some garden props: acorn, peg, needles

  • Figure out how to store the tile information

FIxes! particles, collision and layout generation

I’ve very happy today that I figured out how to set up the merged foliage actor’s collision (just go into SM to edit the collisions).

ezgif.com-gif-maker (14).gif

In addition I changed the logic a bit so that we can spawn the layout immediately after the character comes in. There is still a little delay to get it finish spawning so i might have to consider the performance hit the event tick is generating when it tracks the player’s location at every tick. maybe i can give it a range to reduce the performance hit.

It’s amazing how much of a difference the project feels once i added the character and replaced it from the template robot. the aesthetics of the scene is much more coherent and kinda makes me wanna keep working on it.

I also attached the particles to the player so now everywhere should have butterflies and particles!

Going to take a slight break to healdsberg, so i will come back to work after monday

next steps

  • Add pick up able items into the tile blueprints

  • finish up setting up the foliage tiles

Character in

Today was a day off from work so i had a chance to do a little more for this project. I added the cat character into the project and immediately feels so much better.

There is some trickiness i have to resolve with the initial spawn tile set and then suddenly snap to the asycn spawn tile set once the player moves off its starting location

ezgif.com-gif-maker (11).gif

I also spent quite some time trying to figure out how to get the foliage spawner work for each of the tiles without getting too crazy at runtime.

The trickiness here is that i would like the spawning to not be based on boxes but of a custom shape. there isn’t really a way to do it through the box line trace since the BP is based on a random point generated within the bounding box. I considered creating a separate mesh components in the tile and a custom channel “foliage spawn“ to generate the hits. but it’s not been fruitful.

So i tried out a dumber path. To paint the foliage on a tile then merge the actors into a static mesh and just dump that into the WFC tiles. It’s not clever also have some issues with maintaining collision on the rocks. It’s fun to see it in the context nonetheless.

ezgif.com-gif-maker (13).gif

Oh I also added a blendshape for the blinking of the eye because it looked a little creepy with just a static stare

Next steps

  • Finish doing the foliage merge for all tiles and see if im happy with how things look

  • set up spawn logic for collectable

Clearing BP WFC actors

I was struggling for a while to figure out how to change the WFC plugin from a static mesh spawner to a BP actor. It worked at first when I attached the actor on its own and the problem was that the element wasn’t getting cleared. I spoke with Ivan (the plugin creator) and he recommended to attach it to the wfcactor. Which didn’t quite work. There was duplicates and etc and parts of it is getting removed but not some of them.

ezgif.com-gif-maker (8).gif

It was tricky to tease out the issue so i changed the BP content to just simple colour tiles and tried to debug. At the end Ivan saved the day again. He suggested to not attach it to the spawn wfc actor and instead just attach it to the blueprint itself and it worked just how it was intended.

ezgif.com-gif-maker (9).gif

That’s great and so the next step now is the figure out how to design the connective pieces and what are the points they connect to each other.

I was also looking at the this blender tutorial, which I attempted to translate that over to UE4. Not quite off to a good start because i can’t seem to figure out how to uv the voronoi vector noise node appropriate in the material graph. Will need some more poking

Next Steps

  • images to represent the tile set

  • Integrate a character

Understanding the wfc tileset

Started the day with trying to understand how the tiles match with each other within the wfc actor. So far it’s working but figuring which tile set matches with which tile set is a little bit challenging. So i am doing some dummy data in the blueprint for now.

ezgif.com-gif-maker (7).gif

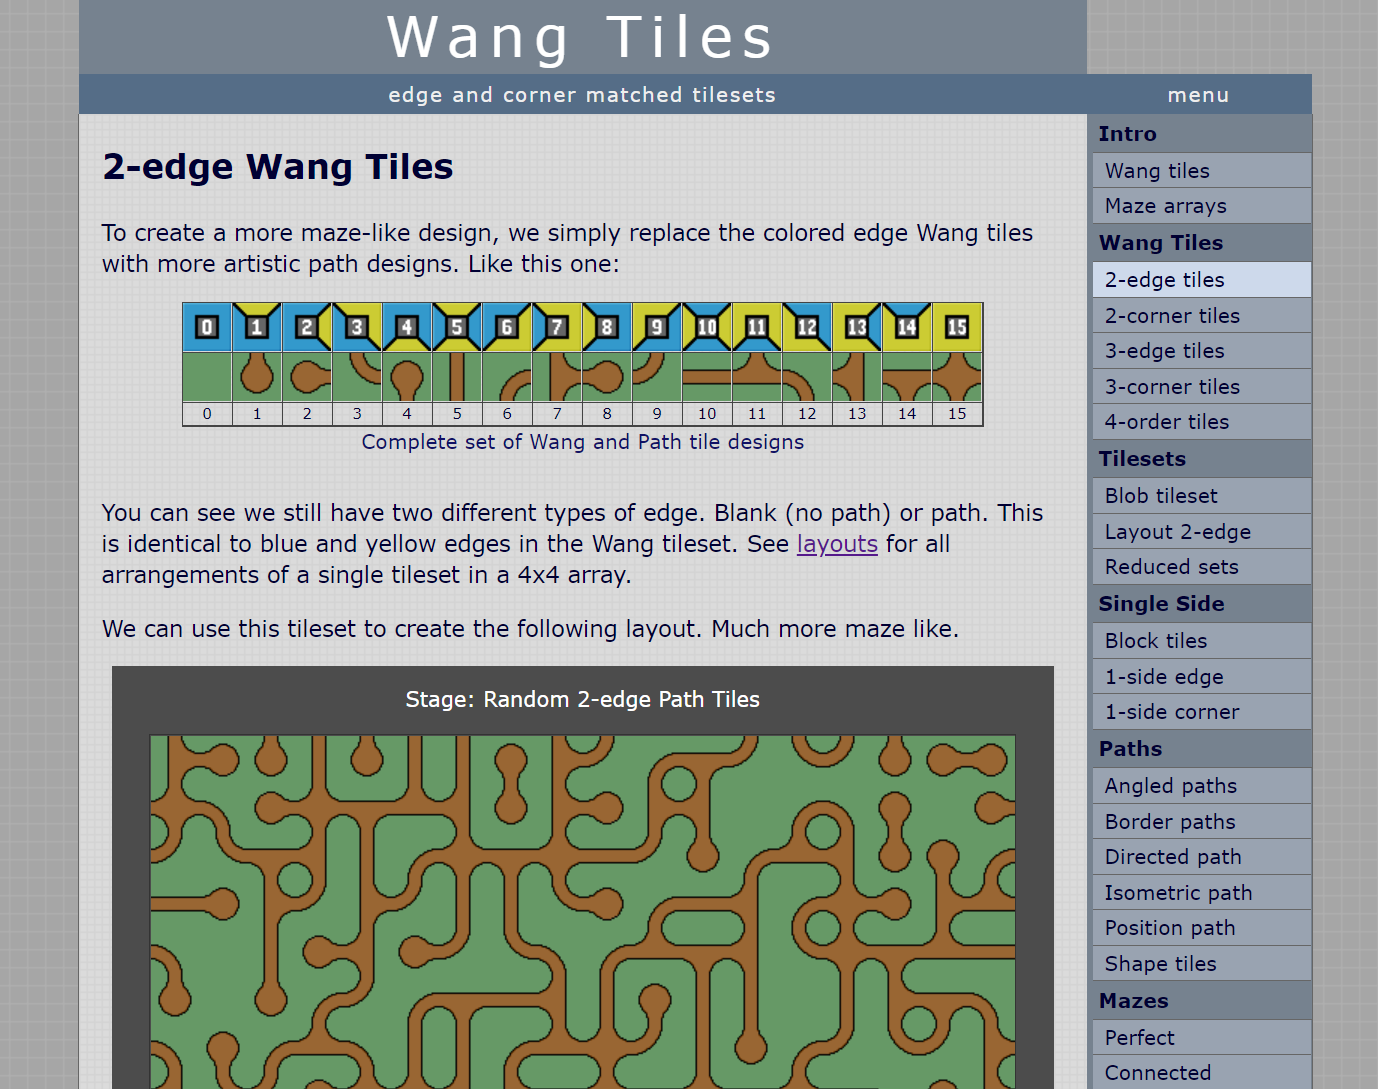
I also added a child actor component to the bp tile set to see them spawn. i spent a little while looking for ways to get texel information out of a 2d texture inside of blueprint so i can add grass patterns to the tile set based on this wang tile site. (I used it’s blob tile set for lucid heist).

http://cr31.co.uk/stagecast/wang/2edge.html

http://cr31.co.uk/stagecast/wang/2edge.html

Started WFC testing

Last time with lucid heist it was a cool experience to make a wfc map using houdini, and one of the big issues was that i wanted to be able to use proceduralism in environment building at runtime. Houdini engine only supports editor whereas I would like to have the maps to always be different when it’s loaded in.

ezgif.com-gif-maker (5).gif

So this time I tried a solution that is built into unreal. There is an option to have it spawn dynamically based on the player’s location which is pretty cool. I was trying out to change the spawn logic so that instead of using the static mesh within the WFCactor it came with it will spawn the blueprint i wanted incase i wanted to scatter the wfc.

ezgif.com-gif-maker (6).gif

I made some changes with the mapping of the name to a blueprint parent class reference. similar to the approach i learnt for making the recipe mappings of the crafting part of the prototype i have made so far.

Screenshot 2020-10-02 203406.png

Next steps

  • Make a couple of sample blueprint WFC tiles

  • Spawn two wfc tile sets at the same time. one for the ground and the other for the spawnable items.